
Golf Course Images
To download an image, right click and select "Save Target As".
Please note all originals, whether landscape, portrait, or square, have been cropped and resized to 150px square thumbnails; the images themselves will vary in size and dimensions.
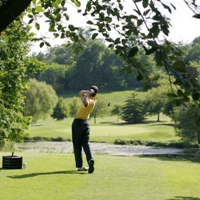
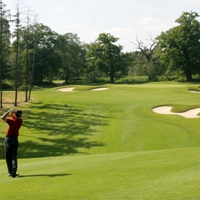
 | FILENAME: bh2.jpg |
| Classic shot of Brocket Hall, with golfers attacking the 4th green. | |
| SIZE: 4437 x 3328 / 12.9MB | |
 |
 | FILENAME: mel02_1.jpg |
| A golfer tees of from the par 3 second hole on the Melbourne Course, crossing the River Lea for the 1st time on his round. | |
| SIZE: 3504 x 2336 / 6.76MB | |
|
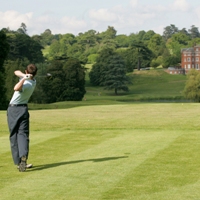
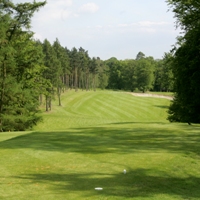
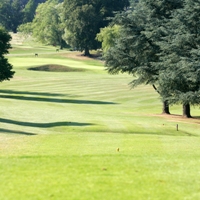 | FILENAME: mel04_1.jpg |
| A view from the 4th tees on the Melbourne Course. | |
| SIZE: 3504 x 2336 / 8.05MB | |
|
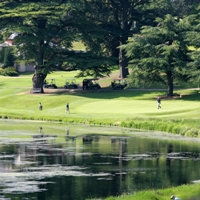
 | FILENAME: mel04_2.tif |
| Golfers on the 4th fairway attack the green across the water. | |
| SIZE: 3504 x 2336 / 23.4MB | |
|
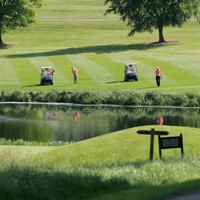
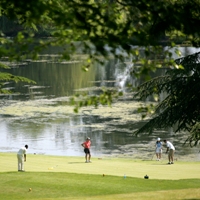
 | FILENAME: mel09_1.jpg |
| View of the 9th green on the Melbourne, a par 3. The perfectly manicured 18th fairway is in the distance. | |
| SIZE: 3504 x 2336 / 6.76MB | |
|
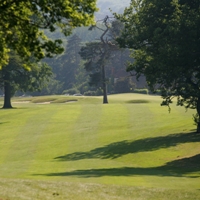
 | FILENAME: mel16_1.jpg |
| Brocket Hall is in the background as golfers putt out on the 16th hole on the Melbourne. | |
| SIZE: 3504 x 2336 / 7.88MB | |
|
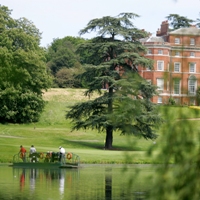 | FILENAME: mel18_1.jpg |
| To reach the 18th green, golfers use the ferry to cross the River Lea for the last time. | |
| SIZE: 3504 x 2336 / 6.69MB | |
|
 | FILENAME: mel18_2.jpg |
| Brocket Hall overlooks the 18th on the Melbourne as a golfer tees off towards the river. | |
| SIZE: 3504 x 2336 / 6.46MB | |
|
 | FILENAME: mel18_3.jpg |
| Golfers putt out on the 18th green on the Melbourne. | |
| SIZE: 3504 x 2336 / 6.87MB | |
|
 | FILENAME: mel18_4.jpg |
| The Clubhouse can be seen on the left as golfers finish their round on the 18th, and another group approach the 1st tee. | |
| SIZE: 3504 x 2336 / 7.82MB | |
|
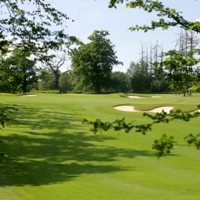
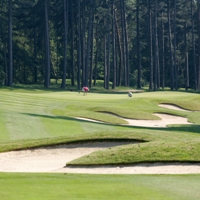
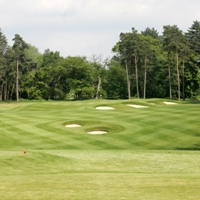 | FILENAME: palm03_1.jpg |
| The 3rd fairway of the Palmerston shows two central pot bunkers. | |
| SIZE: 3504 x 2336 / 6.72MB | |
|
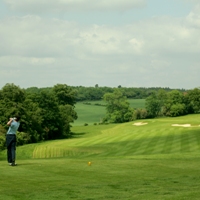
 | FILENAME: palm04_1.jpg |
| A golfer plays his approach to the 4th on the Palmerston Course, after negotiating the severe sloping fairway. | |
| SIZE: 3504 x 2336 / 6.98MB | |
|
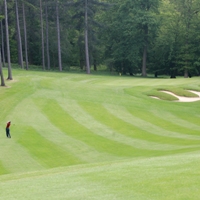
 | FILENAME: palm04_2.jpg |
| A view from the 4th green on the Palmerston, back towards the tee showing the sloping dogleg fairway. | |
| SIZE: 3504 x 2336 / 6.08MB | |
|
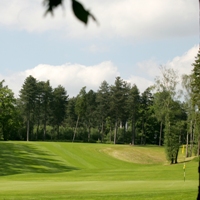
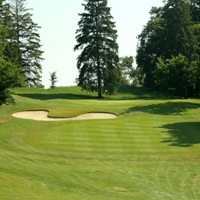
 | FILENAME: palm06_1.jpg |
| From the 3rd tees, the 6th green can be seen sitting amongst the tall trees, at the top of a steep valley. | |
| SIZE: 3504 x 2336 / 6.68MB | |
|
 | FILENAME: palm06_2.jpg |
| The 6th fairway on the Palmerston is split in two by a steep valley. | |
| SIZE: 3504 x 2336 / 6.91MB | |
|
 | FILENAME: palm06_3.jpg |
| A view from the top of the valley, showing the surrounds of the 6th green on the Palmerston. | |
| SIZE: 3504 x 2336 / 6.76MB | |
|
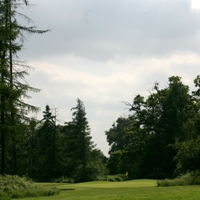
 | FILENAME: palm08_1.jpg |
| The Palmerston's par 3 8th hole looks closer than it is! | |
| SIZE: 3504 x 2336 / 7.08MB | |
|
 | FILENAME: palm10_1.jpg |
| The 10th on the Palmerston slopes towards the open rolling hillsides as the golfer begins his journey back towards the woodland. | |
| SIZE: 3504 x 2336 / 5.98MB | |
|
 | FILENAME: palm12_1.jpg |
| A chalk pit is the main hazard on the Palmerston's 12th hole. | |
| SIZE: 3504 x 2336 / 6.92MB | |
|
 | FILENAME: palm13_1.jpg |
| Bunkers alpenty on the Palmerston's par 5 13th. | |
| SIZE: 3504 x 2336 / 6.74MB | |
|
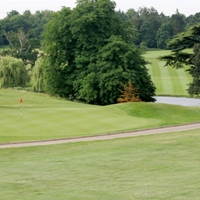
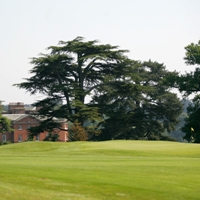 | FILENAME: palm18_1.jpg |
| The 18th green on the Palmerston has Brocket Hall in the background as the golfer returns to the open parkland of the Estate. | |
| SIZE: 3504 x 2336 / 5.89MB | |
|
 | FILENAME: palm18_2.jpg |
| 18th fairway of the Palmerston Course. | |
| SIZE: 3504 x 2336 / 6.18MB | |
|
 | FILENAME: ball-bh.jpg |
| A Brocket Hall logo ball with the Hall itself in the background, taken from the 18th tees. | |
| SIZE: 3504 x 2336 / 4.86MB | |
|